Friday, September 21, 2018

My New Best Friend ... YouTube

Now that I have time ... I've been exploring the many techniques out there for card and paper crafting.  As mentioned in the last post, scrapbook.com has many FREE on-line videos you will have access to once your register (which you will need to do to place any orders anyway.)  The site even sets up your personal "classroom" and keeps track of your classes for you!  My personal favorites have been anything by Tim Holtz, anything by Stephanie Barnard, (both designers for Sizzix) and anything by Simon Hurley.  Simon is a teenager, has his own YouTube channel (Inklipse), and makes everything look super simple!

Set yourself up with a YouTube account so you can "subscribe" to your favorites, and it will be easier to find their latest videos.  Some post videos when the mood strikes, some weekly, and others daily.  Some will be representing specific companies, others will use a variety of materials and products.  (This is when you too will start building your stash!)

Once on YouTube, you can search by technique, or specific designers, or companies.
Some key words for techniques you might want to explore:
   Folds
   Die Cuts
   Stamping
   Embellishing
   Watercolor
   Foiling                     All of these with Cards or Paper Crafting (ie. Card Folds).

Designers to search for (and the ones I have found many ideas from):
   Simon Hurley or Inklipse (mentioned above)
   Jennifer McGuire Ink - her videos are very clear and easy to follow - she is a Guru!
   Justine Hovey
   Mixed Up Craft   
   Positively Papercraft
   Maymay Made It 
   K Werner Design
   France Martin         and you will discover many more...

Companies:
   Sizzix
   Gina K Designs
   Thermo Foil or Deco Foil
   Stampin' Up

Then there is Pinterest ... search any of the above there too.  Or, you can follow any of my boards.
Many of the above also have FaceBook and Instagram pages/groups/feeds.  This will get you started and you will discover many more on your own.  If you come across a good one, feel free to leave in the comments for others.  Happy Searching!

Wednesday, September 12, 2018

Keeping Busy ...

Many have asked how I like being retired... Retirement is great.  I honestly have been keeping so busy, I do not know how I had time to work!  There are the daily routines and chores around the house and household projects.  But beyond that there is the 'crafting', as well as Silver Sneaker classes (exercise) twice a week - starting this week - monitoring my Fantasy Football team, and reading - FOR PLEASURE.

I'm 'old school' - While I have electronic devices, and read the news on-line, I like holding a book in my hands... So I went to the library, got a new library card, checked out (and finished!) a book, and have several "on hold" which I am picking up three more this week...


Have you read The Nightingale by Kristin Hannah yet?  I like Hannah's style of writing and will definitely be checking out (no pun intended) some of her other 22 titles.  Click on Book 'Club', or page link above, for review and other books I'm reading ...


What are some of your favorites?  Leave in comments below ...

Tuesday, September 11, 2018

MIA ... for over two years!

Life has a way of getting in the way...  With my eyesight getting worse due to cataracts (aka 'cadillacs') I had to put Tangling on the back burner.  Thankfully, surgery in Jan 2017 and March 2017 gave me renewed vision, however I didn't return to Tangling (still vowing that I will, one day) but instead developed a "passion for paper" and onward to custom card making and all things paper craft related.

It began when I purchased a Cricut Explore Air2 and began making items with paper (and vinyl) for the classroom and school.  Of course, I couldn't stop with just one machine, and have now built up an inventory of machines including (but not limited to):
Cricut Air 2
Cuttlebug
Big Shot Plus (12" wide)
Xyron Creative Station (sticker maker, cold laminator, magnet maker)
Envelope Punch Board
Scoring Board
2 paper cutters
Hot Laminator

Then there are the countless smaller, can't live without (well, maybe one can), "tools" such as:
Misti positioner w/ the additional Creative Corners
Stamp Shami
Heat Gun (like a mini hair dryer)
large tweezers
Daubers / Blenders
Teflon Bone Folder
Cutting Mat
many embossing folders (for dry embossing)
many die cuts
many stamps
many ink pads of various types and colors
many embellishments (ribbons, trim, jewels, beads, sequins, glitter-sparkle, shimmer, shine-bling ...)
anti-static powder
embossing powder(s) (for heat embossing)
crystal drops
foils
many adhesives, gules, tapes, dimensionals ...
colored pencils, pens, markers, watercolors ... and
too much paper!

Deciding to retire in June 2018 - I then had the pleasure of organizing it all ... Multiple "bins", drawers, and organizers later and I have a well appointed craft room (and could practically open a store)!  My favorite work space is still the kitchen counter, so my every-day usage items are in the dining room (We don't use that room anyway so, why not?) with the rest of the inventory upstairs in what used to be the computer room/office.  Now I have time to return to blogging as well.

Many people have seen my recent work and asked, "How did you do that?"  Or, "I want to do that!"  So ...

Let's Talk Paper

While a yellow legal pad is good for taking notes from the many YouTube videos (a future post) I've watched since June, and sketching out ideas, and making lists of material wish lists; and 20 lb. bond is good for the printer, for "scratch", folding to catch embossing powder and using as a protective pocket to put foil through the laminator in, there are many other "papers" one needs in their stash to satisfy the creative urges ...

Card Stock - comes in various "weights" (and colors, and designs) - at least 65 lb - both 8.5 X 11 and 12 X 12.  At the vary least: white, black, and kraft (like brown paper bag color).  This is used for card bases, fronts of cards, envelopes, to cut die shapes, to stamp ...  (The higher the weight, the heavier the paper.  Depends on the project, but 110 lb is probably the heaviest used.)
Designer (or DS) - single sheet or "pads"; 6 X 6 or 12 X 12; HUGE variety of prints and patterns; sometimes bond weight, sometimes card stock weight.

Bristol - smooth finish, 100 lb.  This is used for a heavier card base, and can be used for watercoloring on if not using a lot of water.

Watercolor - heavy, slight texture, used for front of card or when a heavy paper is needed.  Due to the texture it can be a little more difficult to stamp on.

Vellum - transparent, at least 40 lb.  It can be used as an overlay, can be stamped, colored on, embossed on, and foiled.  One can also make a transparent envelope for other projects as well.

Acetate - not really a "paper", but can be used with paper as a base, to create a "window" in a card, or even a decorated card front when a transparent look is needed.

Photo - glossy finish - tricky to dry and not smear ink and markers (having a heat gun is a necessity), but has it's purposes as a card front.

Other "Tools"

These are personal preferences.  Some make crafting easier, some are not necessary but nice to have, and some you can live without.  The various YouTube videos (a future post) make suggestions and demonstrate them in use and the decision is up to the crafter.  I would definitely recommend:
a good paper cutter / trimmer
a score board
a Teflon Bone Folder - they really do make nice creases in the paper without 'scaring' it
a Misti (or similar) if you are going to be doing a lot with stamps

And eventually you will probably want a die cut machine.

Suppliers

Again, personal preferences ... There are the local craft stores - Michael's, Joann's, Hobby Lobby, for basics.  However, the more I explored, the more variety of materials I discovered out there, I found the local establishments limiting.  Enter the on-line sites.  Amazon has almost anything (key word, almost) and shipping is fast if you have Prime.  
** [Quick side track:  Did you know if you go to https://smile.amazon.com/ Amazon will make a donation to a non-profit organization of your choice based on what you spend?  No cost to you.  It isn't a lot, but every little bit helps.  Along the top, black bar there is a Support: spot and a default will be listed, but clicking on the little down arrow allows you to change to your choice - may I suggest Vision of Vets in Prescott Valley, AZ?  Yes, I have a personal connection to the project, but no kick back ... just FYI - Your contribution won't show until your order(s) ship, but they do eventually :) ] **

https://www.scrapbook.com/  has a HUGE inventory, a user friendly site, sales all the time, free on-line classes once you register (that I have learned a lot from), and they ship fast.  Items arrive well packaged and in great condition.  Another plus, they have videos and examples of their items being used on the description pages.

https://www.simonsaysstamp.com/  also has a HUGE inventory and ships quickly.

I have found if you do a Google search for the name of an item you are looking for, you will find it somewhere on-line.

Enough rambling for today - I will return soon with YouTube links where you too can learn the many techniques for crafting and being creative... and pictures of recent projects!

Saturday, January 2, 2016

Closing Out 2015 ... Onward to 2016

Well, motivation took over today and the holidays are put away for another year - all the decorations, trimmings, and memories are packed away ... The holiday season is always a fun time with family, making and giving surprises, enjoying the school district's two week winter break ... and it's hard to see it come to a close.  One more day off, then it's back to work and all the stresses that come with that!  The "New Year" is a good time for reflecting on the past year, the coming year, the "must-do" resolutions (which typically last about 3 weeks), which I'm going to call "goals", and inspirations instead ....

First and foremost, my family members are healthy, I'm healthy - can't wish for more than that!  My main resolution(s), stay healthy!!

Now, as for reflections, goals and inspirations .... Joining several "Tangling Type" Facebook Groups last year, and scanning / pinning many Pinterest posts, I found myself frequently on overload with tangles and projects I'd like to do ... so many that I sometimes got bogged down, and then did nothing!  This year I'd really like to NOT do that, but instead really bring a few projects to completion ...
  • During break I managed to clean out and organize the "craft" / "computer" room.  There are still a few things to dispose of, but it looks much better!  In doing that I realized I have a stash of yarn going to waste!  Some yarn was incorporated in abandoned projects, so I took them apart to "re-purpose" the skeins.  I found some solid colored, eggshell, bulky yarn, from an afghan I was knitting several years ago as a gift for my departed Father-In-Law.  I didn't get it finished before he passed, and didn't want to finish it, so it sat... Five days ago I started a new afghan - crocheted instead, in a "waffle" stitch - with a lake hook.  It's about one-fourth complete right now... Once completed I might take on another knit or crochet project to continue using "the stash."
  • In the mean time, I have returned to my tangling journal that I started in August, but put on the back burner when working on Christmas projects.  It is almost complete and I have great ideas for 3-4 more!  In fact, I have already cut the paper and brainstormed ideas for a few of them ... they will be WIP at the same time, as they all have a different "theme" and depending on my mood at a given time, I will be able to pull out the corresponding "journal".- My first journal (started in August), that will be finished soon (watch for pics!) is "pure" - white paper, black ink, shading with ink and/or graphite.  I added new techniques as I learned them, which I will do with the others as well.
    - One of the next ones will be more colorful - some pages with watercolored or bleeded-tissue backgrounds; other pages white with colored pens; others with "colored" in patterns.  All techniques I am anxious to explore.
    - Another I'm planning, will be "found poetry".  I'm debating if I want to mount the "poetry" on white or tan ...
    - I've recently found videos of an artist demonstrating Mandalas and I really like her style (Search you tube for Alena Light) - so another journal will be all Mandalas
    -  I like quotes, and as with my first art journal, find it a great place to feature favorite quotes - the forth journal will probably be another one of quotes I come across over time...
  • And then there are "Challenges" which are a great way to learn and stretch techniques ... The Challenges I worked on during the summer of 2015 were weekly, and participating in 5-6 at a time - was a bit overwhelming!  Consequently, I stopped trying to keep up, although I did learn a lot when I was participating ... Now I have come up with my own "challenge".  This one will be a monthly, rather than a weekly challenge and will have a monthly theme.  I'm thinking a 6" X 6" "tile (which will actually be heavy paper as true "tiles" don't come in that size. - More to come on that ...
That's it - my resolutions, reflections, inspirations / goals, for 2016!  Time will tell if I achieve all of this .....
Tangle On!

Friday, January 1, 2016

Tangled Gifts ...

Three Sets:

First, for parent volunteers - tangled ornaments
The ornaments were frosted glass; with "Identapen" tangles.
The "boxes" were made with cardstock and the 1-2-3 Punch Board
by We R Memory Keepers.

Next, the students made a set of "cards" with matching envelopes for their parents.  Each student made four.
The cards were 8 1/2" X 5 1/2" cardstock - folded and corners rounded.
The envelopes were "invitation" size.
The students drew "dangle" tangles, and chose a piece of the design on the card
to put on the matching envelope.
Some students added just a tiny spot of color on their designs.
The set of cards were stacked and tied with a string of raffia.
A simple gift that the parents really enjoyed receiving!

Lastly,  I like the set of card stationary and decided to make a set for a friend.
I used the same cardstock and envelopes as above.
First, I colored with watercolor pencils and blended with a tiny bit of water.
Since I was working on cardstock and not watercolor paper,
I did not want the paper too wet!
I used a coordinating colored Micron to tangle a simple design
and colored pencils for shading.


Handmade gifts are always fun to design and create, and surprise people with.  I hope as I get more proficient with tangling, I can create other fun gifts for next year!


Thursday, December 31, 2015

Holiday Happenings

Christmas time is a fun time to "craft" and with my passion for tangling I had to put the two together ... a little research and I decided to try my hand at ornaments.

I started off with basic frosted glass ornaments available at most hobby and craft stores -  i chose clear frosted, white, silver, gold, and black (or a very dark gray).  A tip I read about (and I regret I can't remember where, but I think it was on tanglepatterns.com) was to wear a white cotton glove on the hand that will be holding the ornament.  At first I thought this was odd, but the advice pointed out it would keep the oils in your skin off the ornament and nor mar the frosting (it worked!) ... It also gives you a better grip on the ornament.

First, remove the little hanger loop and cap, also making it easier to hold.  I used Identapens on the lighter colored ornaments and White Gelly Roll on the dark ones.  It is a little easier to use patterns / a design that do not need to be exact, but if you want an even design, start with very tiny dots around the top to "divide" the ornament evenly.  Monograms also make an attractive ornament, although it can be tricky to center the letter and keep it straight on a curved surface.  A monogramed ornament make a special gift for family and friends.

Here are a few so far ....


These are (were) all going to be gifts, but hubby keeps wanting to keep each new one I make!

OOPS!  Somehow I forgot to click "Publish!"


Thursday, November 26, 2015

Fall 2015

The fall went quickly and the holidays are upon us!  They seen to be running together craft wise ...

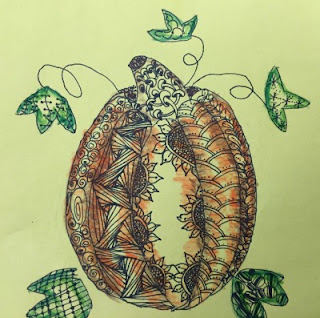
First, pumpkins and more pumpkins!  I actually did these before Halloween, and they stayed displayed through Thanksgiving ... The white, black, and silver will actually be on the mantle up all year, except from tomorrow through Christmas, while the stockings are hung ...


These are all "craft" pumpkins; the "black" ink is Identapen, the white is Gelly Roll.  The silver and beige pumpkins are not tangled, just extras ... their is always next year!

Since it was pumpkin season, I had to take the idea to the classroom, and with a directed draw lesson and a few patterns my fourth graders (ages 9-10) produced these ~ they took them home for Thanksgiving.  They selected where to put the patterns, and added a little color for shading.  This is only the second tangle project the students have done.


Happy Thanksgiving!

Sunday, September 13, 2015

Recovery Happens ...

In 95 degree weather, with about 80 percent humidity and the sun bearing down on a not-so-typical HOT San Diego day, my CZT, Janet Masey, her Step-Mom and daughter, and I teamed up to demonstrate "Tangling" at a community event and resource fair for people getting their lives back on track due to a variety of issues troubling them.  It was good to see there are many resources out there ~ one being Zentangling Classes.  Janet did all the work, I just drew larger examples of various patterns in the background.  She was able to make several good contacts to grow her business.  The interactive demonstration was well received and participants were typically amazed at how easy tangling is ... a few pictures from the day...


I was just happy to get back to tangling after a couple of weeks hiatus. 


Monday, September 7, 2015

It's Been A While ...

... a little over a month actually!  With getting the classroom ready; welcoming 33 new fourth graders; all the planning, prep, and assessments; Back To School Night Presentation for parents (with 32 students represented); visitor from Moscow; Grandson's 4th Birthday; and a granddaughter striking out on her own ~ it has been a busy month!  I do have a few items to share.

Yes, this is a pole dancer, but done for fitness, not the "traditional" pole dancing you might be thinking of ...

This was created from a photograph of, and for, our friend from Moscow.  She is actually a friend of my older son's, but I have adopted her! ... She is in training for a performance with a circus, the equivalent of Cirque du Soleil here in the States.  Lana works out on "the pole" almost daily.  She has incredible strength and is very flexible ... ah, to be that young again!


This next piece was inspired by Project Semicolon.  It is described on the Internet and social media as a "global, faith-based, non-profit movement dedicated to presenting hope and love to those who are struggling ..."  It exists to "encourage, love, and inspire." There is a dedication of this movement to developing a much needed awareness of mental illnesses, so I made it the focus of this tangle.


My oldest Granddaughter is a strong young lady.  She is on the thresh-hold of striking out on her own.  Making the decision to leave home and family was hard, yet she bravely made that decision and is moving out of state - tomorrow.  Since she needed a little encouragement, inspiration, and a lot of love, I gave this piece to her... and said good bye between tears.  At least I know I will see her in a few months ~ and it is really no different than her going away to college - which she will start in January.

As planned, I have started teaching my fourth graders tangle patterns - we have covered 16 and they love it!  Several request we "tangle" on a daily basis ... this coming week we will be starting a project, that I will share in a future post...

Another on-going WIA is a 16-page journal I'm working on.  I signed up for an on-line art journaling workshop with Valerie Sjodin, exactly one week before I reported back to school ... Probably not the brightest thing I have ever done, however I am learning a lot and enjoying working on this project.  In another future post I will feature a page or two .... and the semicolon is featured in that project as well.

I am also excited to have been invited by my CZT Teacher, Janet Masey, to help her at an Exhibition Fair demonstrating tangling next weekend ... I will post how it goes - until then, tangle on - I will be!

Monday, August 3, 2015

The Wedding Gift ... and A Card

Sounds like the title of a movie ...

I took a little hiatus from the challenges to begin a few ZIA projects I needed to finish before the Back-To-School rush ... although I'm already having sleepless nights!

I was excited about this piece, and nervous at the same time!  I wanted to give a colleague a special remembrance of her special day - but would she (and her husband) like it????  (And I am still fairly new to tangling!)  I started with the wedding "colors" - gray and yellow, and of course white.  I chose a dark gray card stock (cut to 8 X 10), white gel pen, and white charcoal pencil (After several "tests" on a scrap piece of the gray paper, none of my yellow pens, markers, pencils, showed up!)

The invitation, and some decorations, had their initials - remembrance #2 - include their initials.  #3 - include the date of their wedding ...

Searching through clipart I found (I think) the perfect design - a heart created with intertwining ribbons ...


I drew the design on paper first, then transferred to the card stock and traced the lines with white gel pen.
I began with the letters, as I had a good idea what patterns I wanted to use and how to apply them - making the L (the bride's initial) a little more feminine than the A (the groom's).

I let the piece rest for a while - I wanted the ribbons to look twisted with both sides having different, complimentary patterns - I needed to think about this ...  I figured out the ribbons, added "dangles" to balance it; shaded with charcoal pencil; and then found (what I think) is the perfect frame (even though it doesn't have yellow in it!)  Hope they like it!  


Let's not forget a card!  I really like the "stacked pattern" look ~ and what better thing to put on the front of the card than the happy couple's names ... Congratulations Lindsey and Andy!!


A Request ... Celtic Knots

It can be dicey - you do something for one colleague, and another "wants one too".  I was actually flattered!  

One of my grade level partners (who had done a ton for me and our classrooms this summer) and her husband have Irish roots, and she requested a Celtic Knot.  So, a little research, and I found a wonderful set (21!) of videos on You Tube by David Nicholls that really made it look so easy!  (And it really wasn't too hard once you got the hang of his little tricks.)  
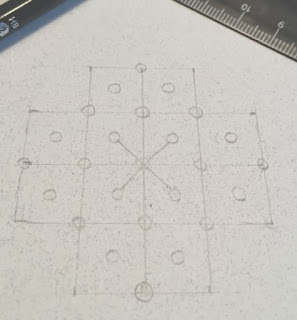
Due to the need for precision, I did use a ruler to lay down the initial grid lines.  The rest is freehand.

Pairs of alternating parallel lines are lightly sketched in (see video link for details).

The edges are sketched in depending on the pattern used - this one is Celtic Hearts (video 5)

Sticking with the whole name, and stacked look, I began ... Another 8X10, pale green paper, Micron Pens (black and green 02, 05, 08), Derwent Watercolor Pencils, white Gelly Roll for one tiny spot, my favorite - embellishments that are organic garden inspired (Zinger, Phystel, and four little Bijous to represent their family), a dangling heart to match the Celtic Hearts, and the "shamrocks" are mine.  I wanted a fun, whimsical look, but not "silly"... 
The
The letters were sketched in, again for uniformity.

Next, I "inked" everything, and added color ...
Finally, the shading and shadows, plus four Bijous, complete the piece.  Here you go Jenn ~


Seven weeks of "pinning" and I have about 1,000 tangling pins on my board ... and growing!

Wednesday, July 22, 2015

Rain ...


Four inches in 24 hours, with three of them all on Sunday in some parts of the area ... made for a wet weekend and a lot of tangle time!!

First, Suzy Mosh's two Challenges - Tangle Me 3 focused on the pattern,  Boomrang.
This is my attempt at trying to make a boomerang look like a "Dew Drop" - I used the same techniques on the large, center.  The original pattern is in the lower left; the variation on the right uses Printemps in the top designs; the variation across the top "lines" the background.  I only shaded the "dew drop boomerang" so it would stand out.


That's New To Me Week 29 focused on D and the artist, Sandy Hunter of Tangle Bucket.
The patterns I used on this tile tells the story of the weekend!  (Which gave me an idea for this school year - students taking one of their writing assignments or part of a novel or poem, and "tell" the story through a tangled piece ... hummm.)  The patterns from bottom to top - in the middle is Dust Bunny (because they are always hiding); Drip-Drop - because it was raining - HARD; Eureka by Sandy - it represents the winds that came along with the rain; and at the top DL Sunray - because we were all waiting for the sun to appear.  It loos black, but is actually on very dark blue paper (representing the stormy sky).  Shading with the white charcoal pencil I think I captured the "fuzz" on the Dust Bunny" and the glow of the sun well.  I like the final result ... 


Monday, the rain was still around ... so I turned to Joey's Monotangle - G - Gridy.  Since it was still cloudy and drippy, I chose some bright colors for the day.  I like this pattern as it has a lot of dimension.  I added a "dew drop" but don't think it shows up as well as on other patterns... I do like the color combination and background varieties ...


Tuesday is "Good News Day" when Adele posts the String Thing Challenge #102.  This week is her father's birthday and the concentration is on Frost Flower, Sez, and Graancirkel.  I turned the string sideways and purposely left part of the string empty, but added a Frost Flower in the corner and dropped a few Sezs in the white area.  A different technique that I've seen on other tiles, especially when there is a larger white space, is to shade the outline string to shadow the area of the pattern, so I tried that ~ While I like all the patterns and shading, overall this tile is not my favorite...